Self Help Documentation
Reserved Seating
Reserved seating gives you full control over seat selection, seat maps, and attendee experience—perfect for theaters, cinemas, stadiums, and premium events.
- Interactive Seat Maps:
- Design custom seat layouts for your venue
- Attendees select their preferred seats during checkout
- Real-Time Availability:
- Instantly updates as seats are booked
- Prevents double-booking and overselling
- Flexible Pricing:
- Set different prices for VIP, regular, and economy seats
- Mobile & Desktop Support:
- Seamless experience on any device
Reserved Seating & Interactive Seat Booking in Eventmie Pro FullyLoaded
Set up any kind of reserved seating arrangement—stadiums, townhalls, cinemas, restaurants, lounges, and more—in your wefetes.com management platform. Offer attendees a seamless seat selection and booking experience with real-time seat availability and interactive seat charts.
you can:
- Drag-and-drop to adjust seats on the seat chart image.
- Enable a seat waiting list: if two users try to book the same seat, the system blocks the seat for the first user.
- Real-time seat availability: blocked seats are instantly shown to other users, preventing double bookings.

- Requirements
- Add Reserved Seating
- Booking Seats
Requirements for Reserved Seating
Before creating reserved seating tickets, prepare two types of high-quality images:
- A full image of the seating arrangement (e.g. stadium, cinema, etc.). Example:

- Cropped images for different ticket types (executive, VIP, etc.). Examples:


How to Add Reserved Seating to Your Event
Follow these steps to add reserved seating tickets:
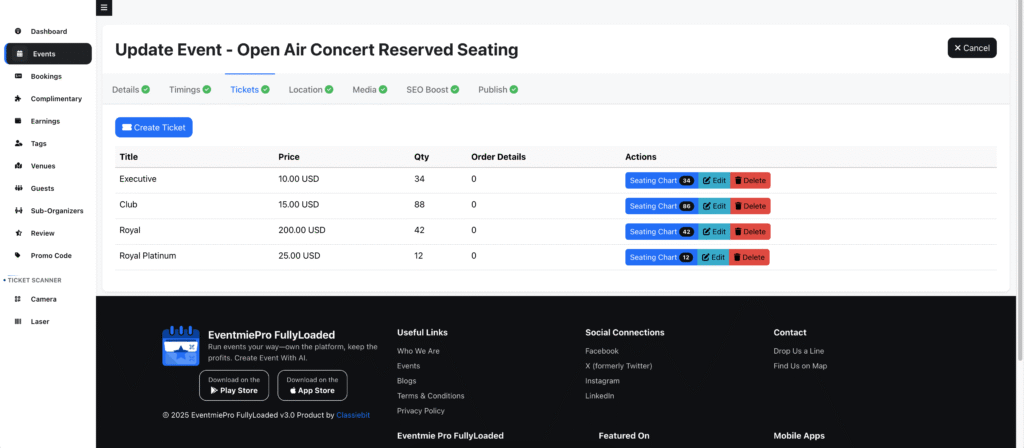
- Go to Event Edit Page -> Tickets Tab.
- Create tickets for the event.
- Click the Seating Chart button.
- In the popup, upload the cropped seating image for the specific ticket type.
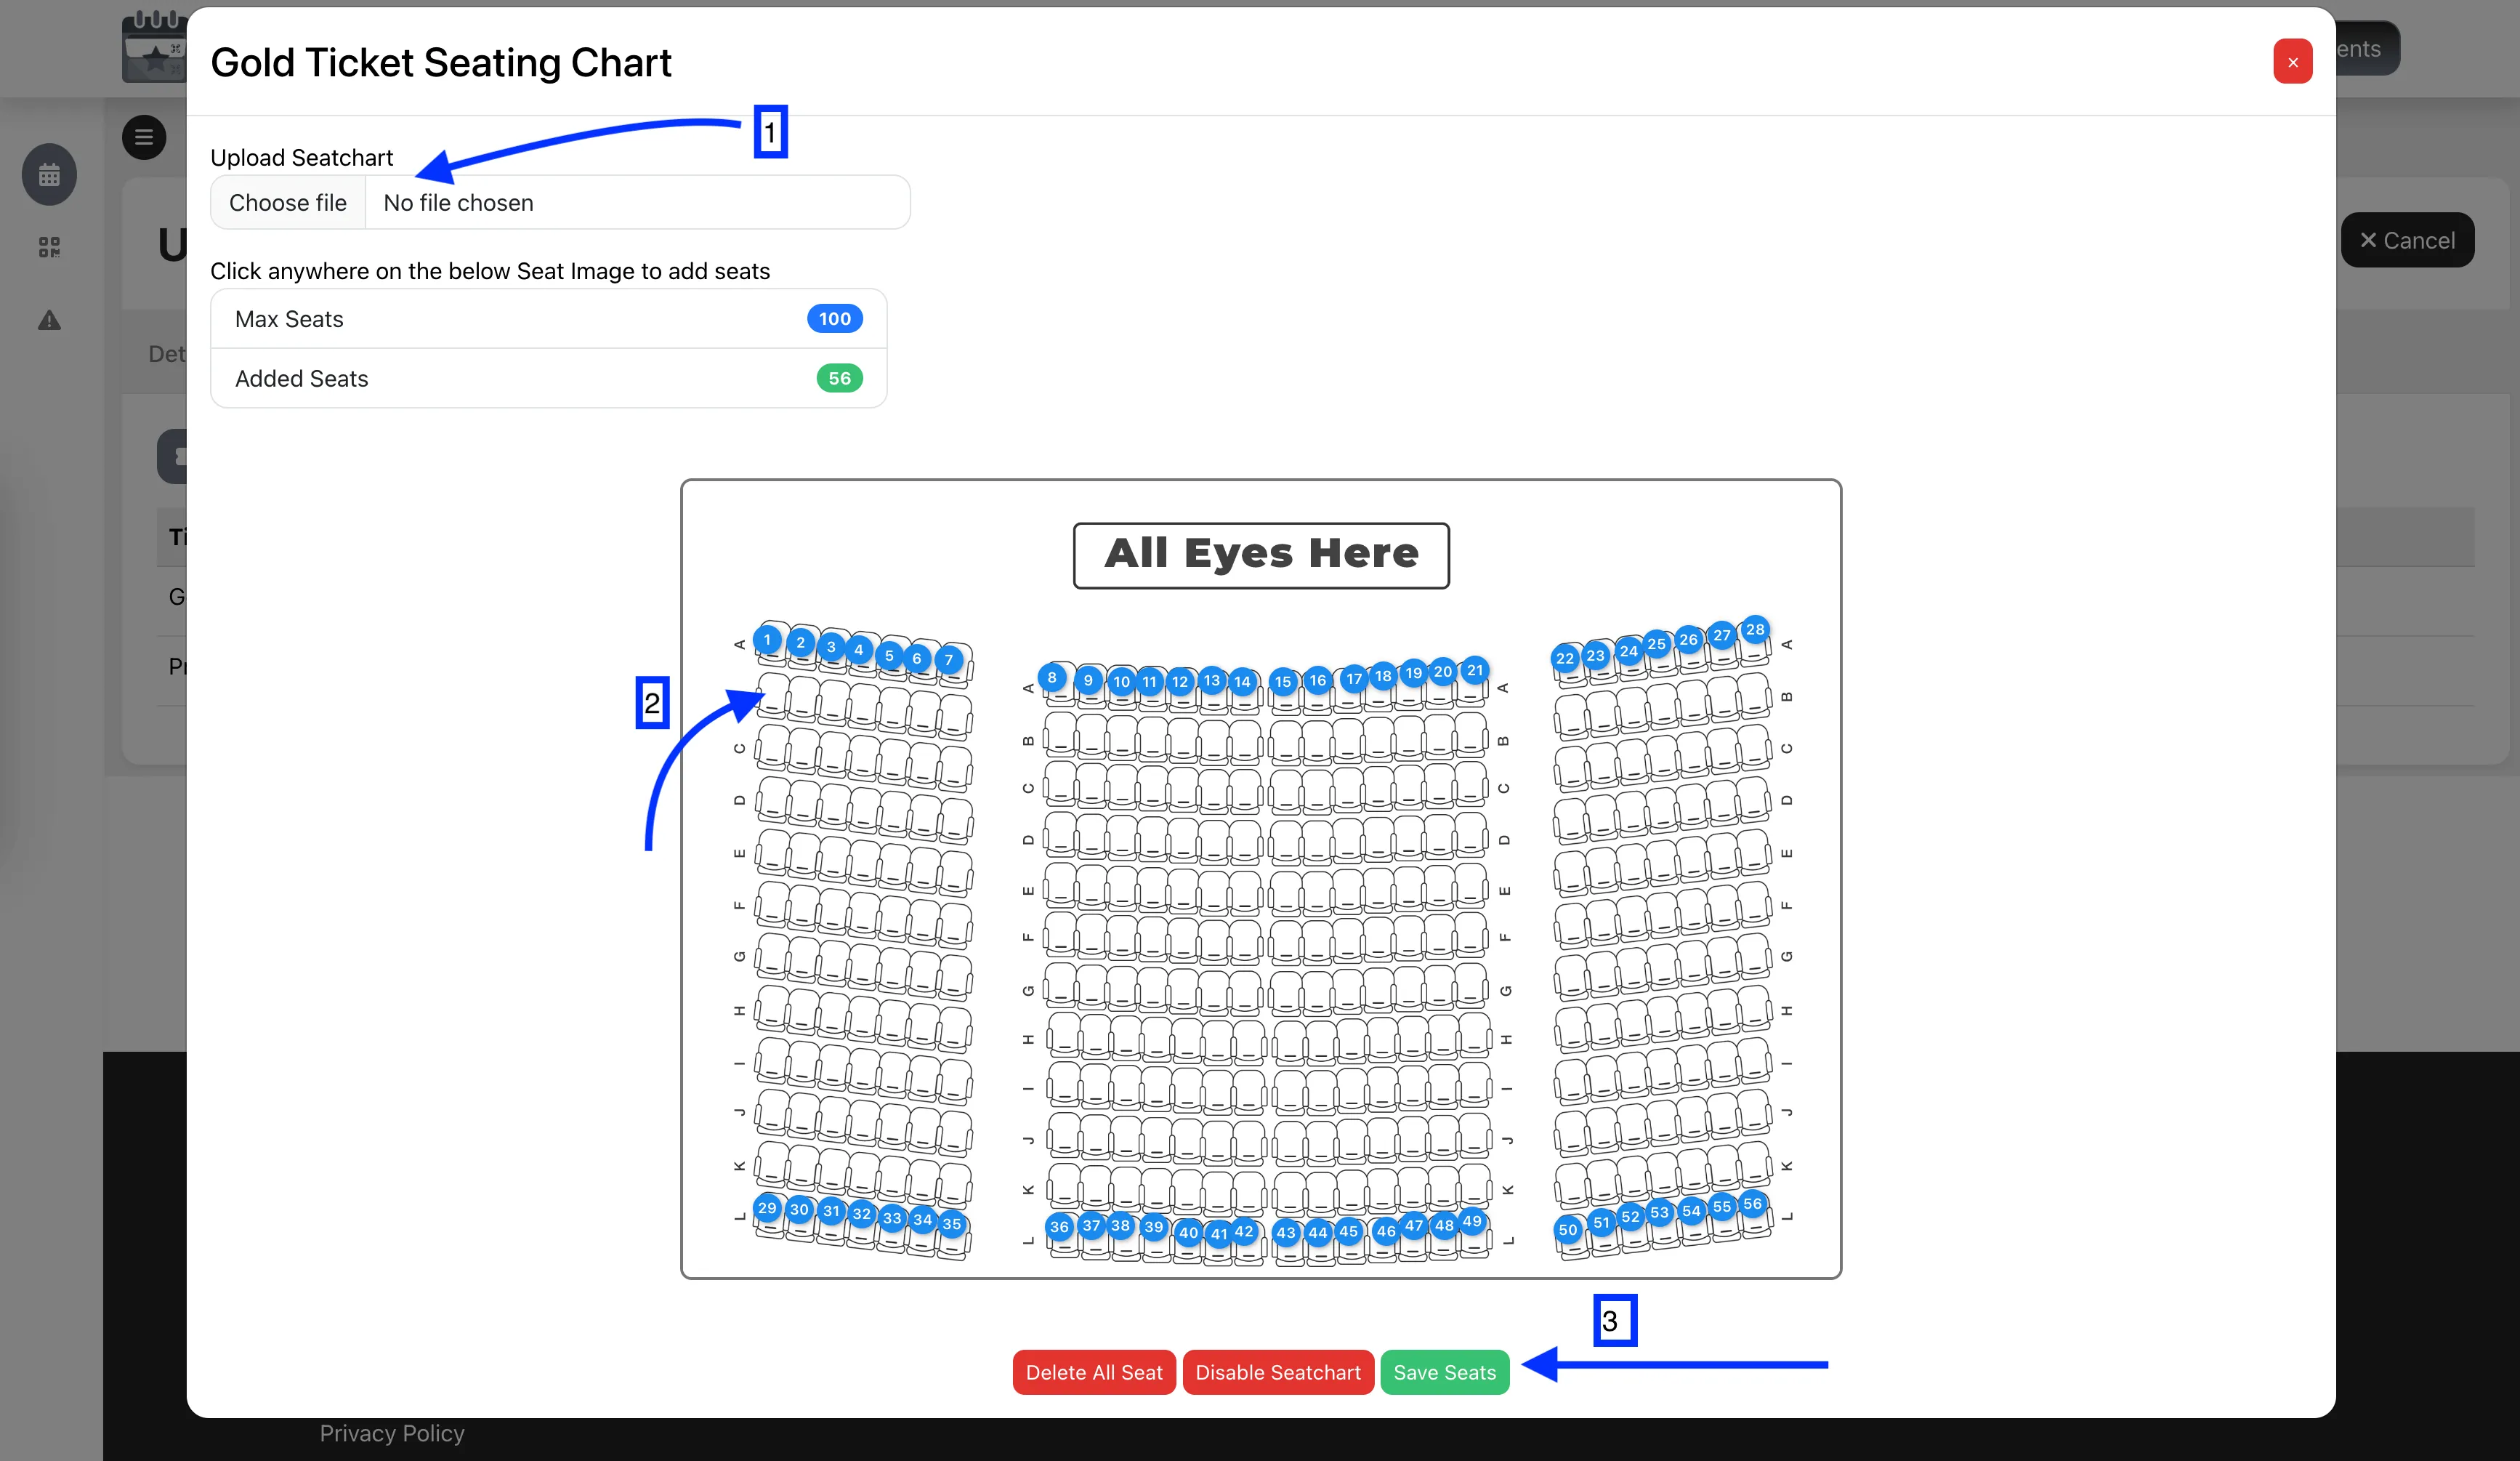
- Click in the center of each seat block to add seats. Drag to reposition seats for perfect alignment.
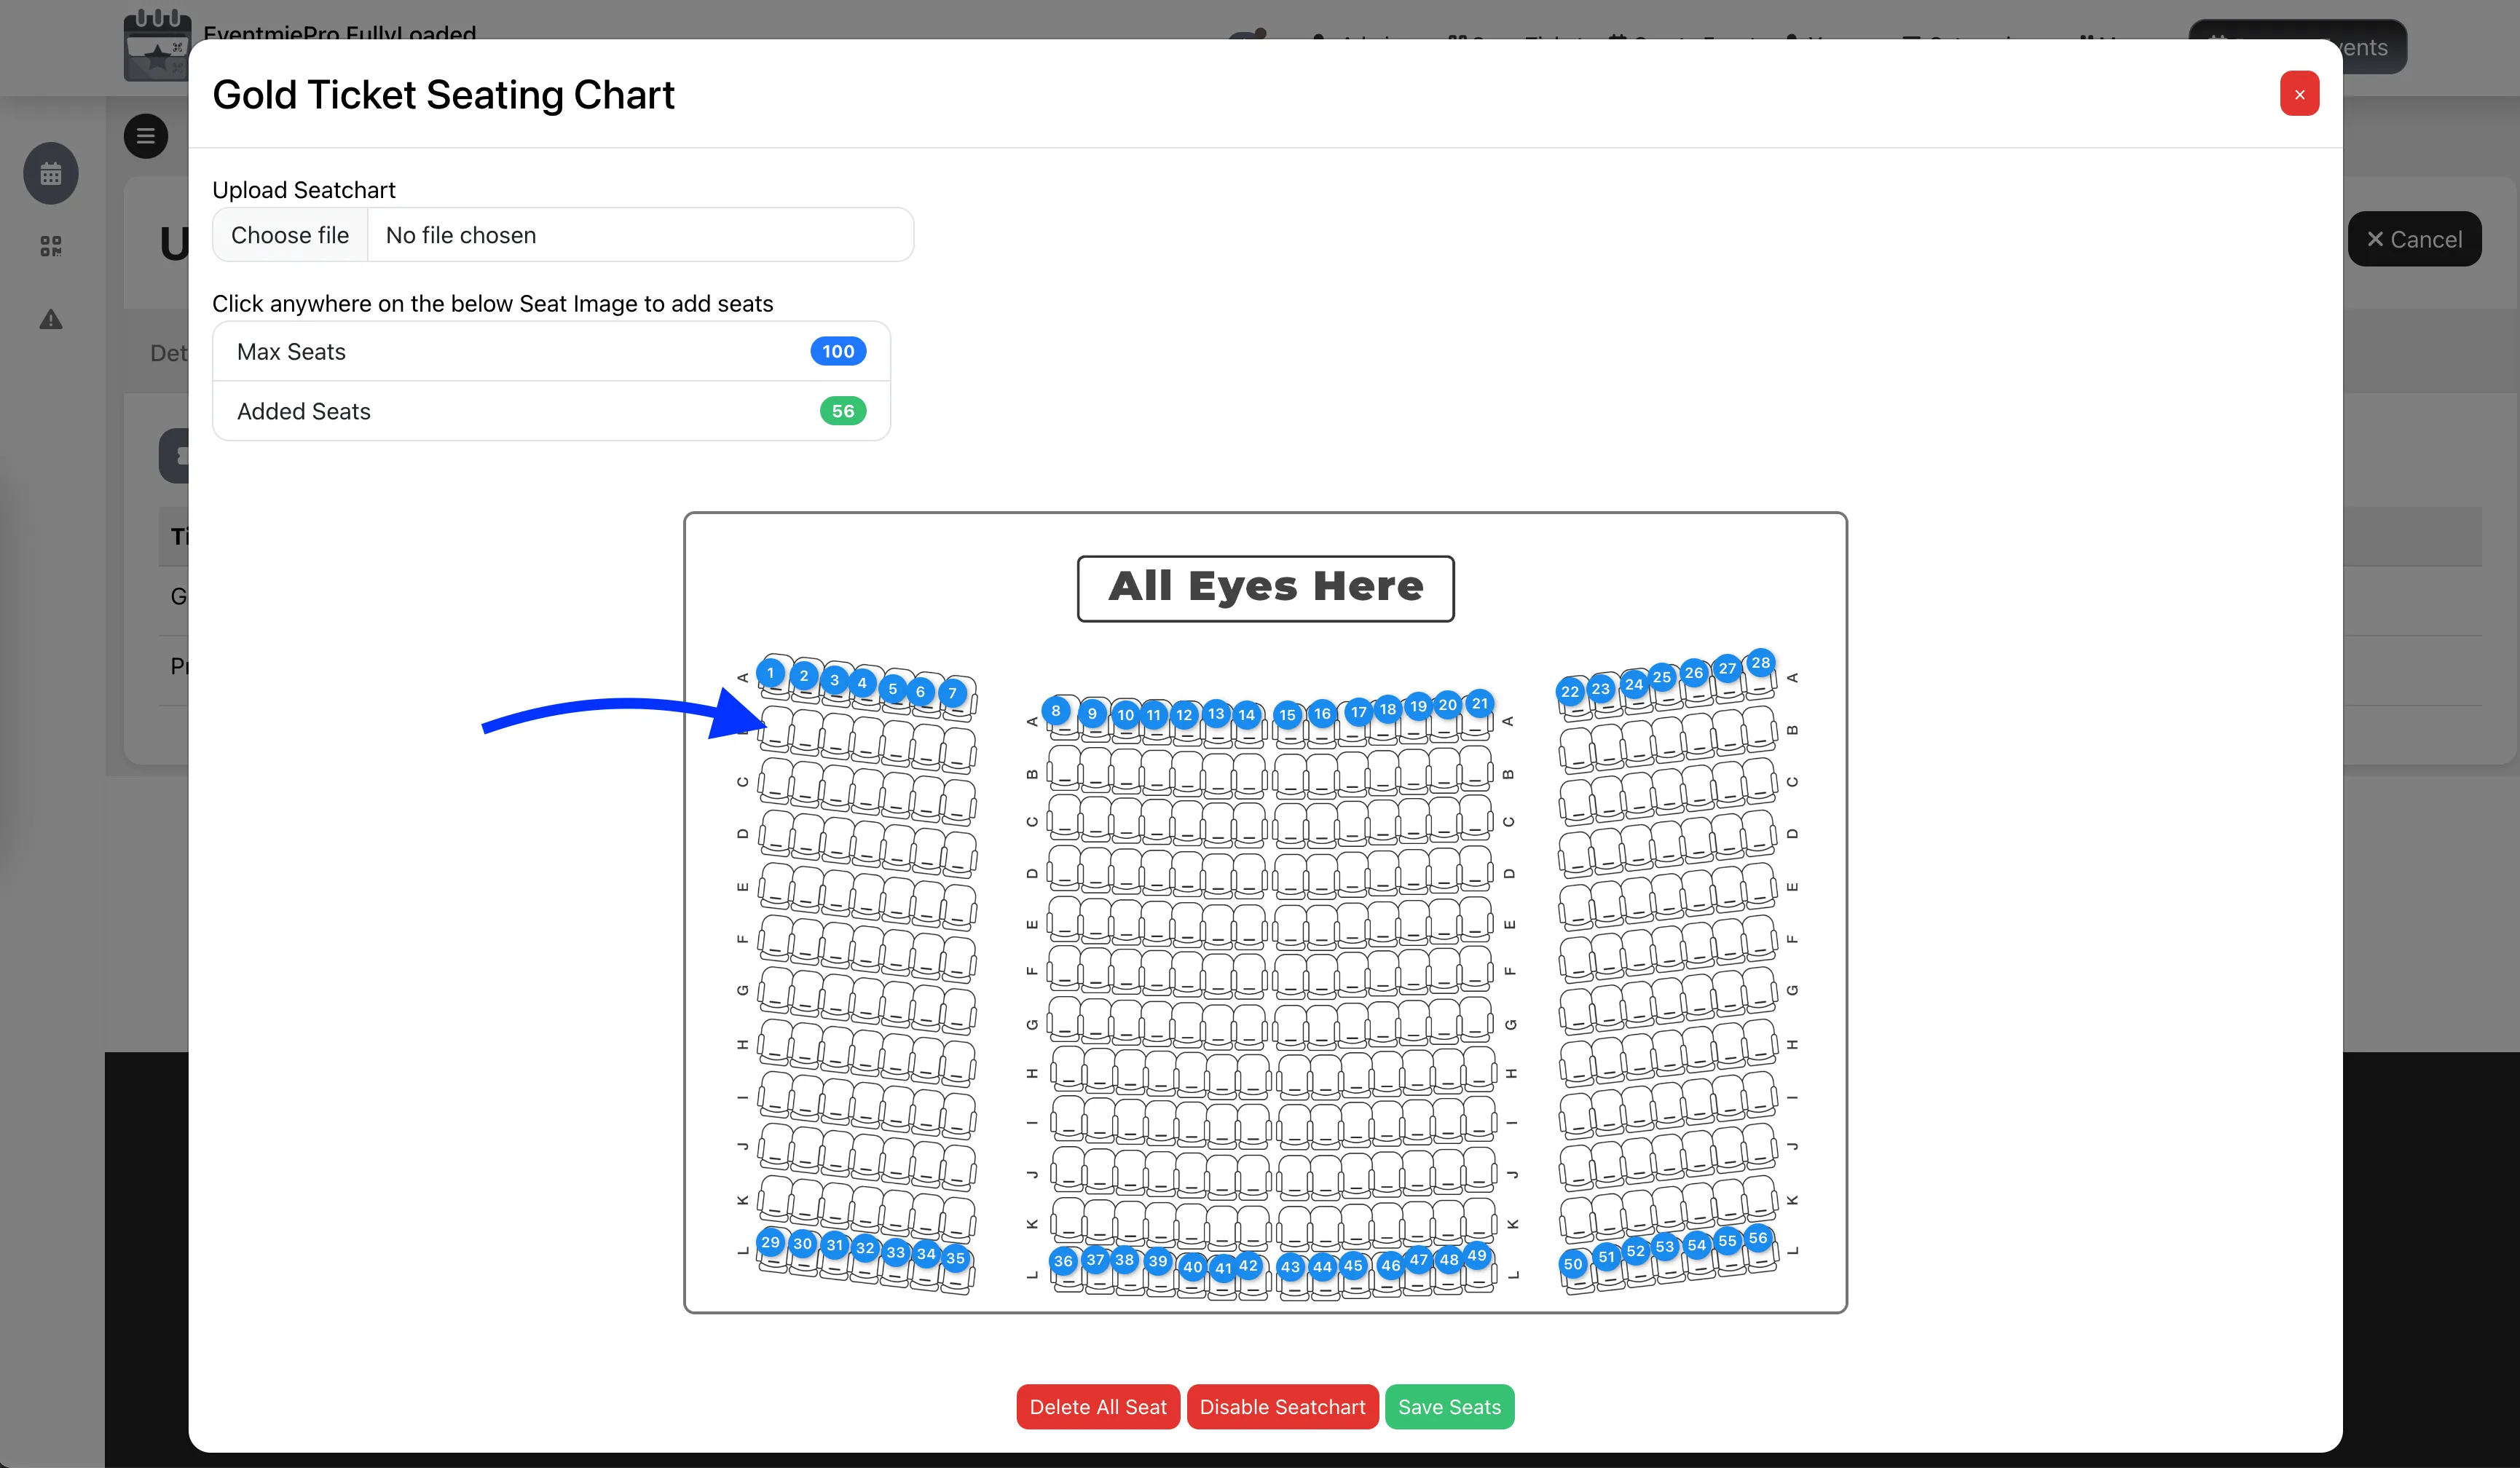
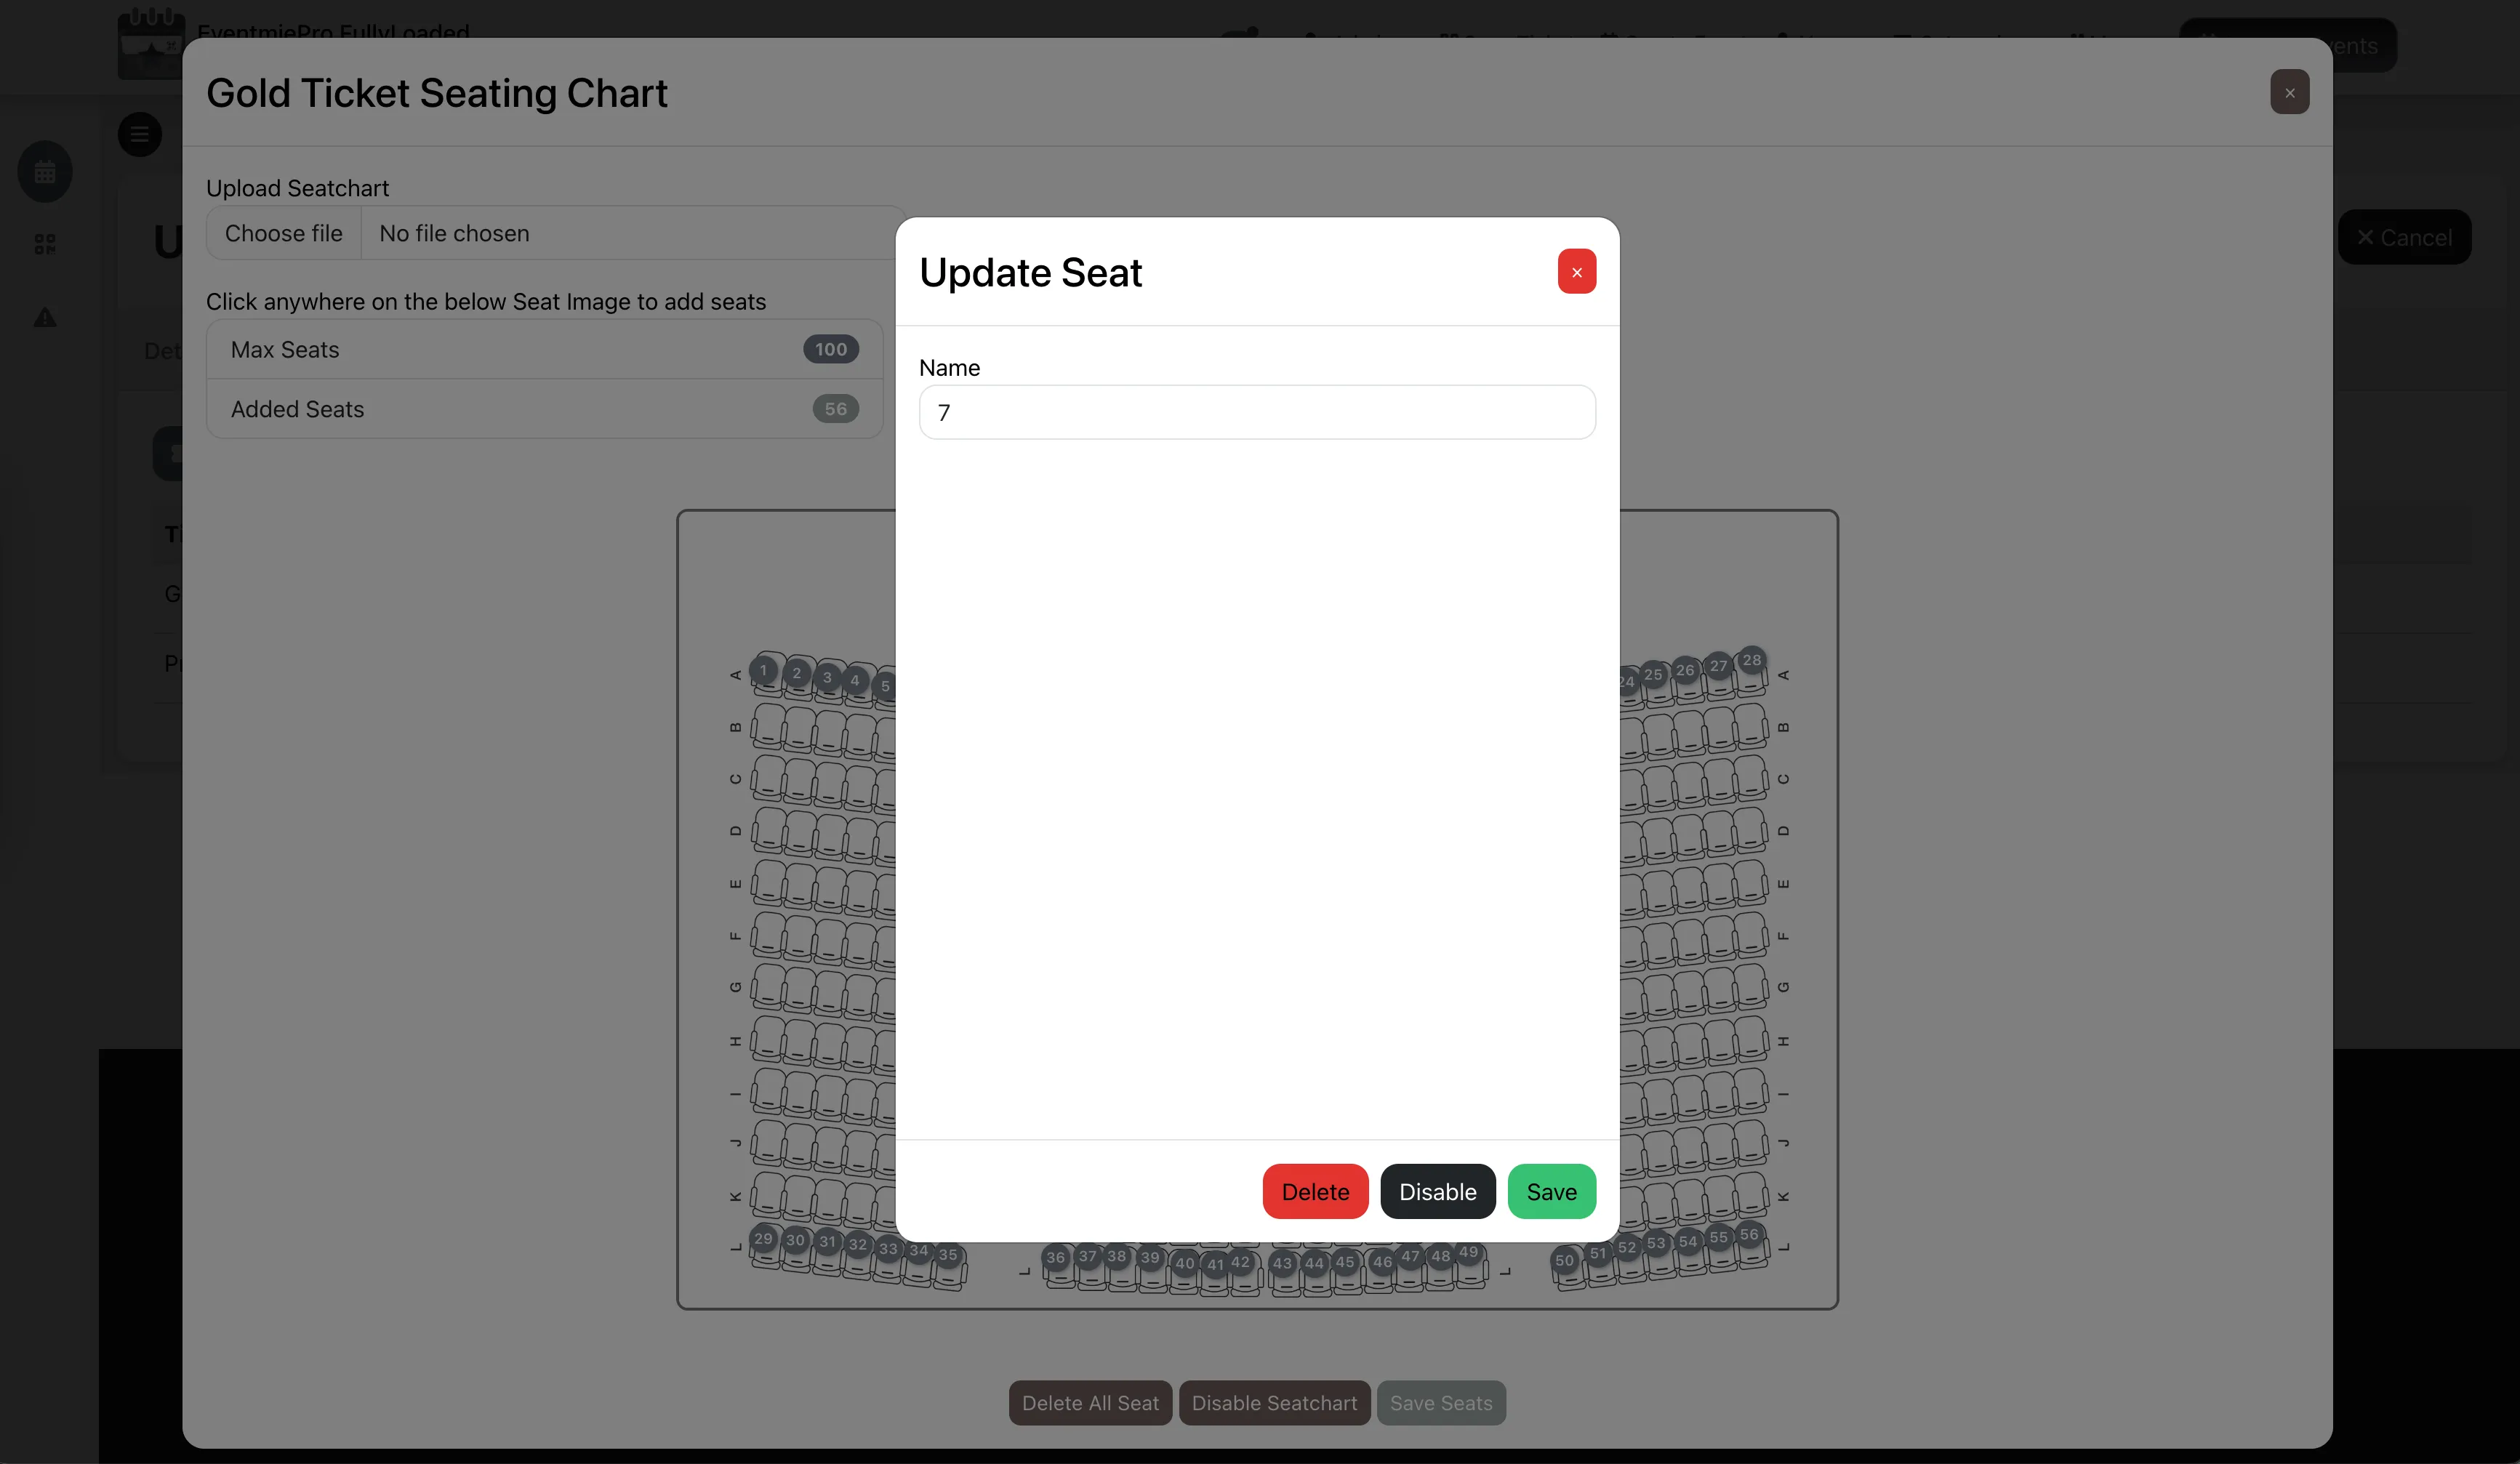
- Rename seats by right-clicking on the seat you added.
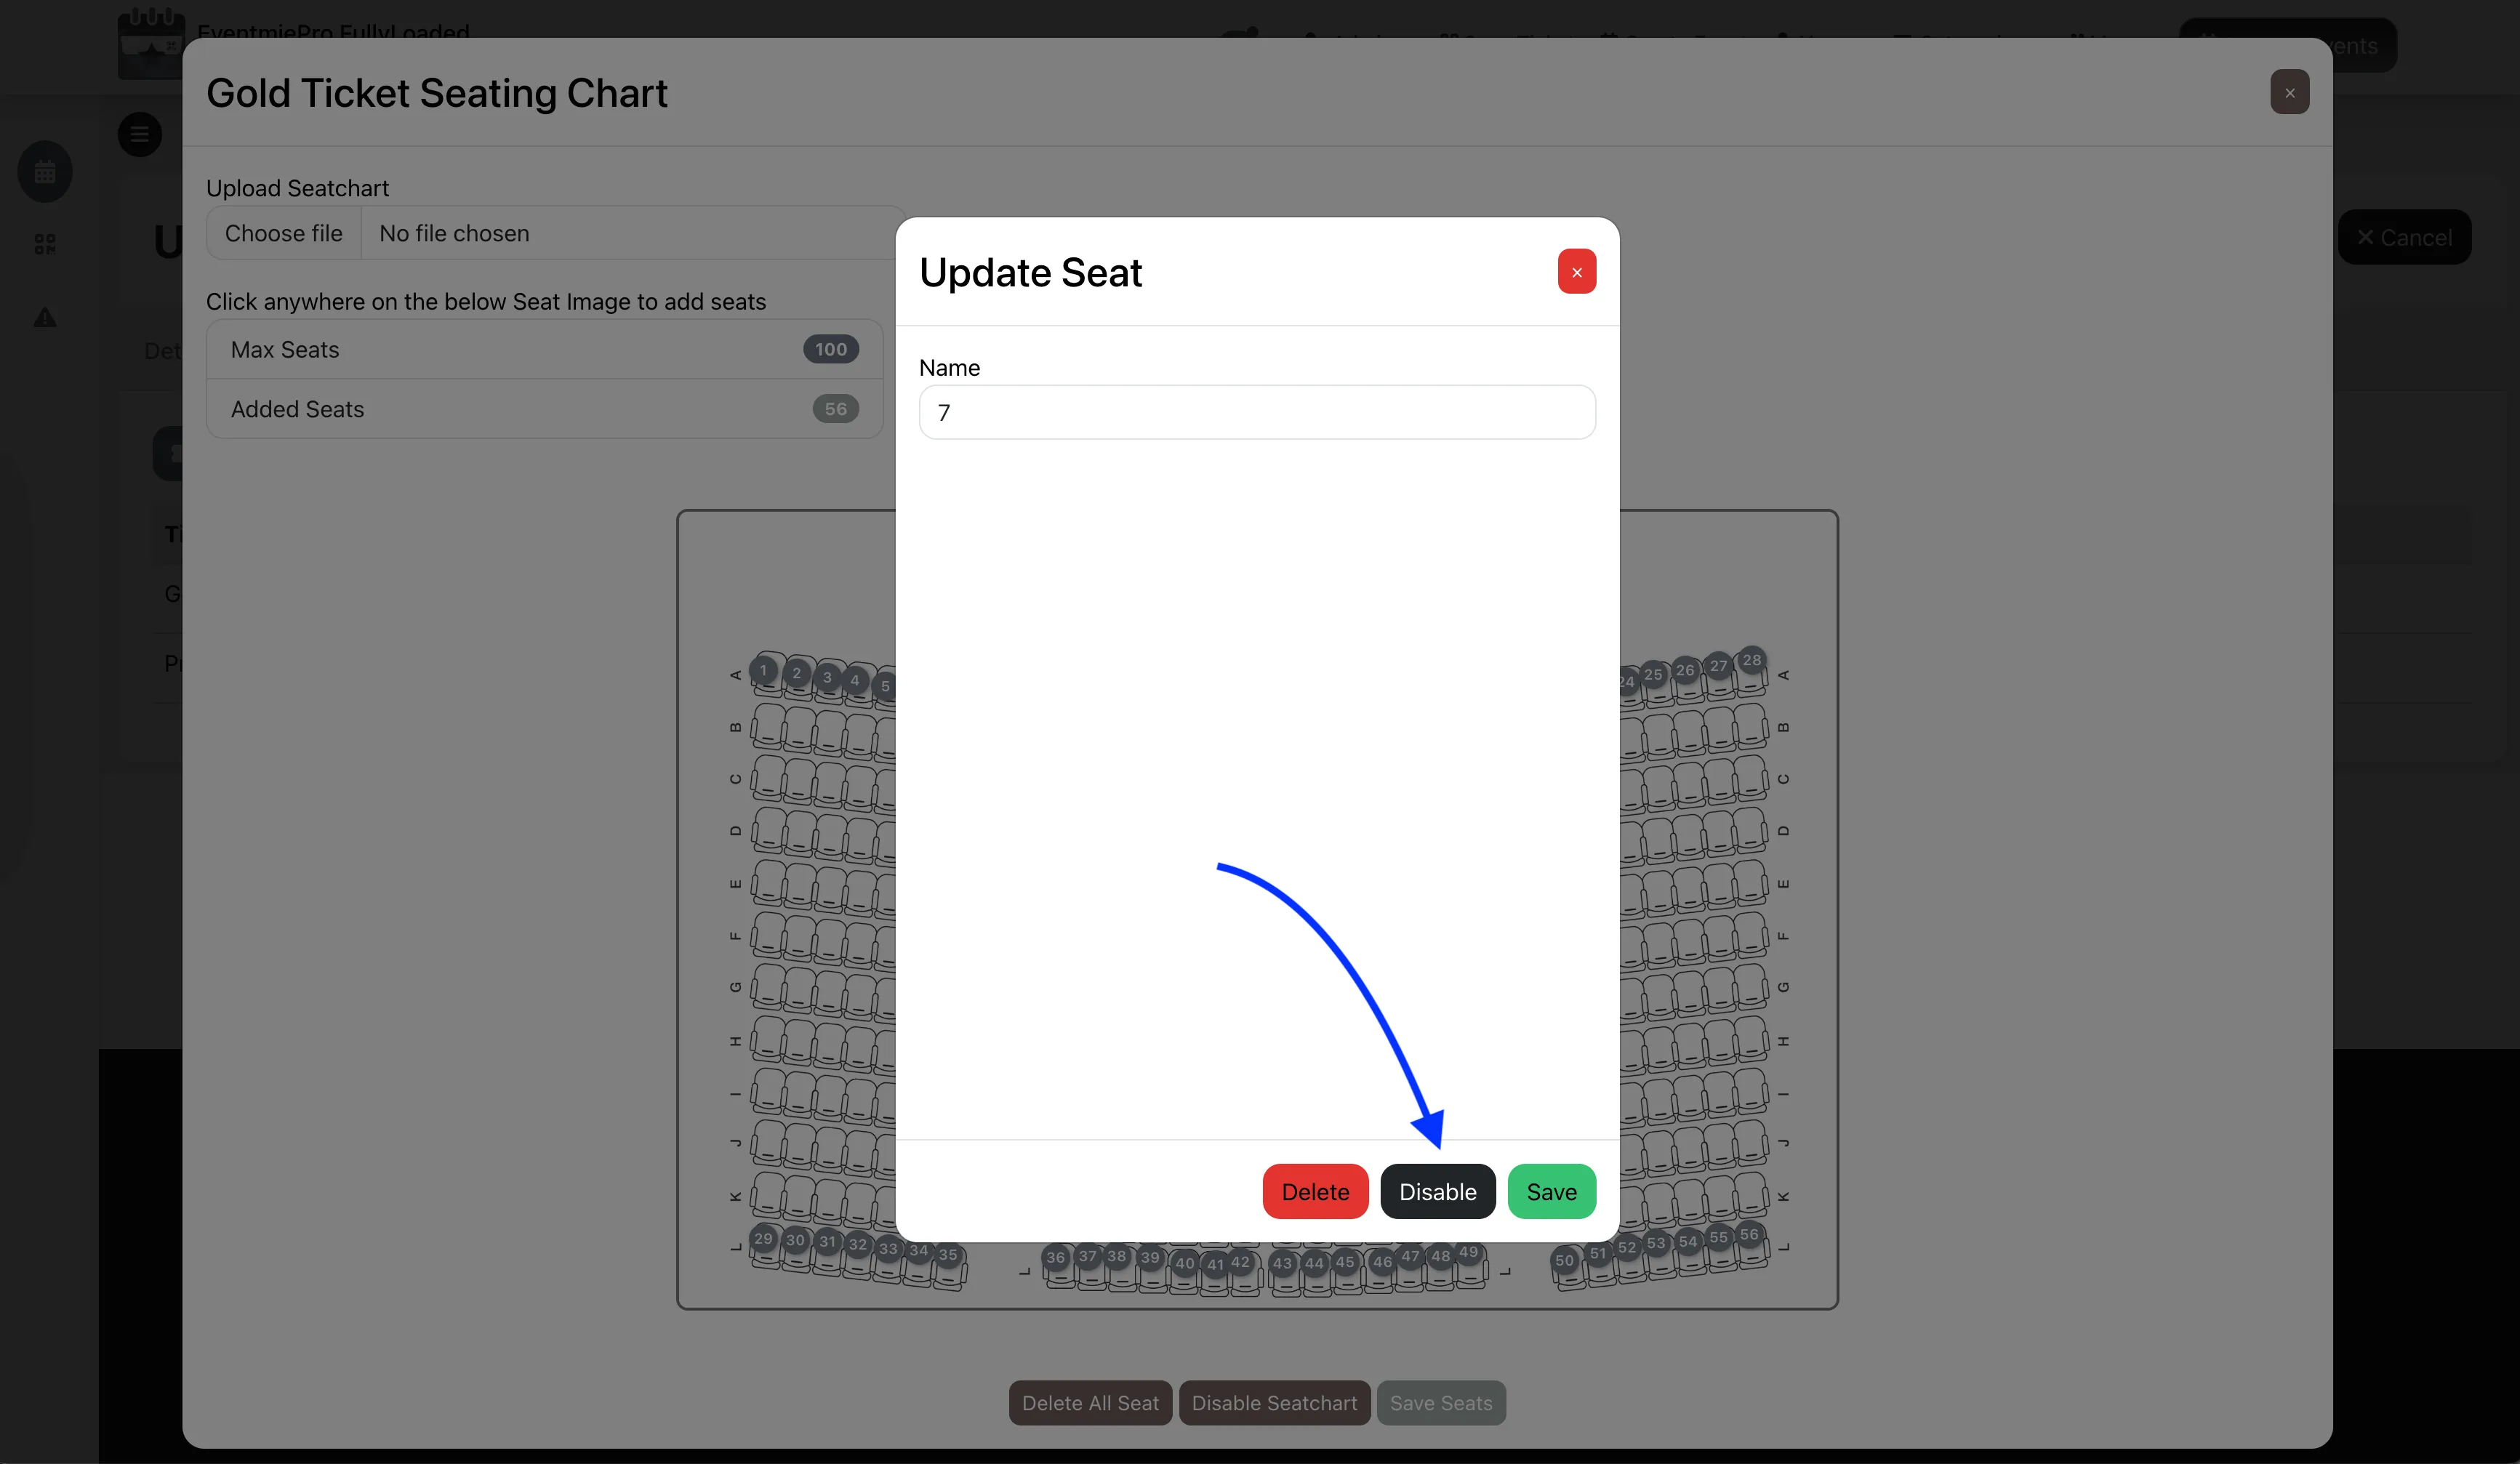
- Disable seats after adding them (for pre-reserved or unavailable seats). Disabled seats appear as unavailable on the checkout popup.
- You can only add up to the maximum number of seats (total ticket quantity).
- Repeat these steps to add reserved seating for other ticket types.


- For general seating (no reserved seats), simply do not add seats for that ticket.
- Go to the Media Tab and upload the full seating arrangement image as the Seating Chart Image.
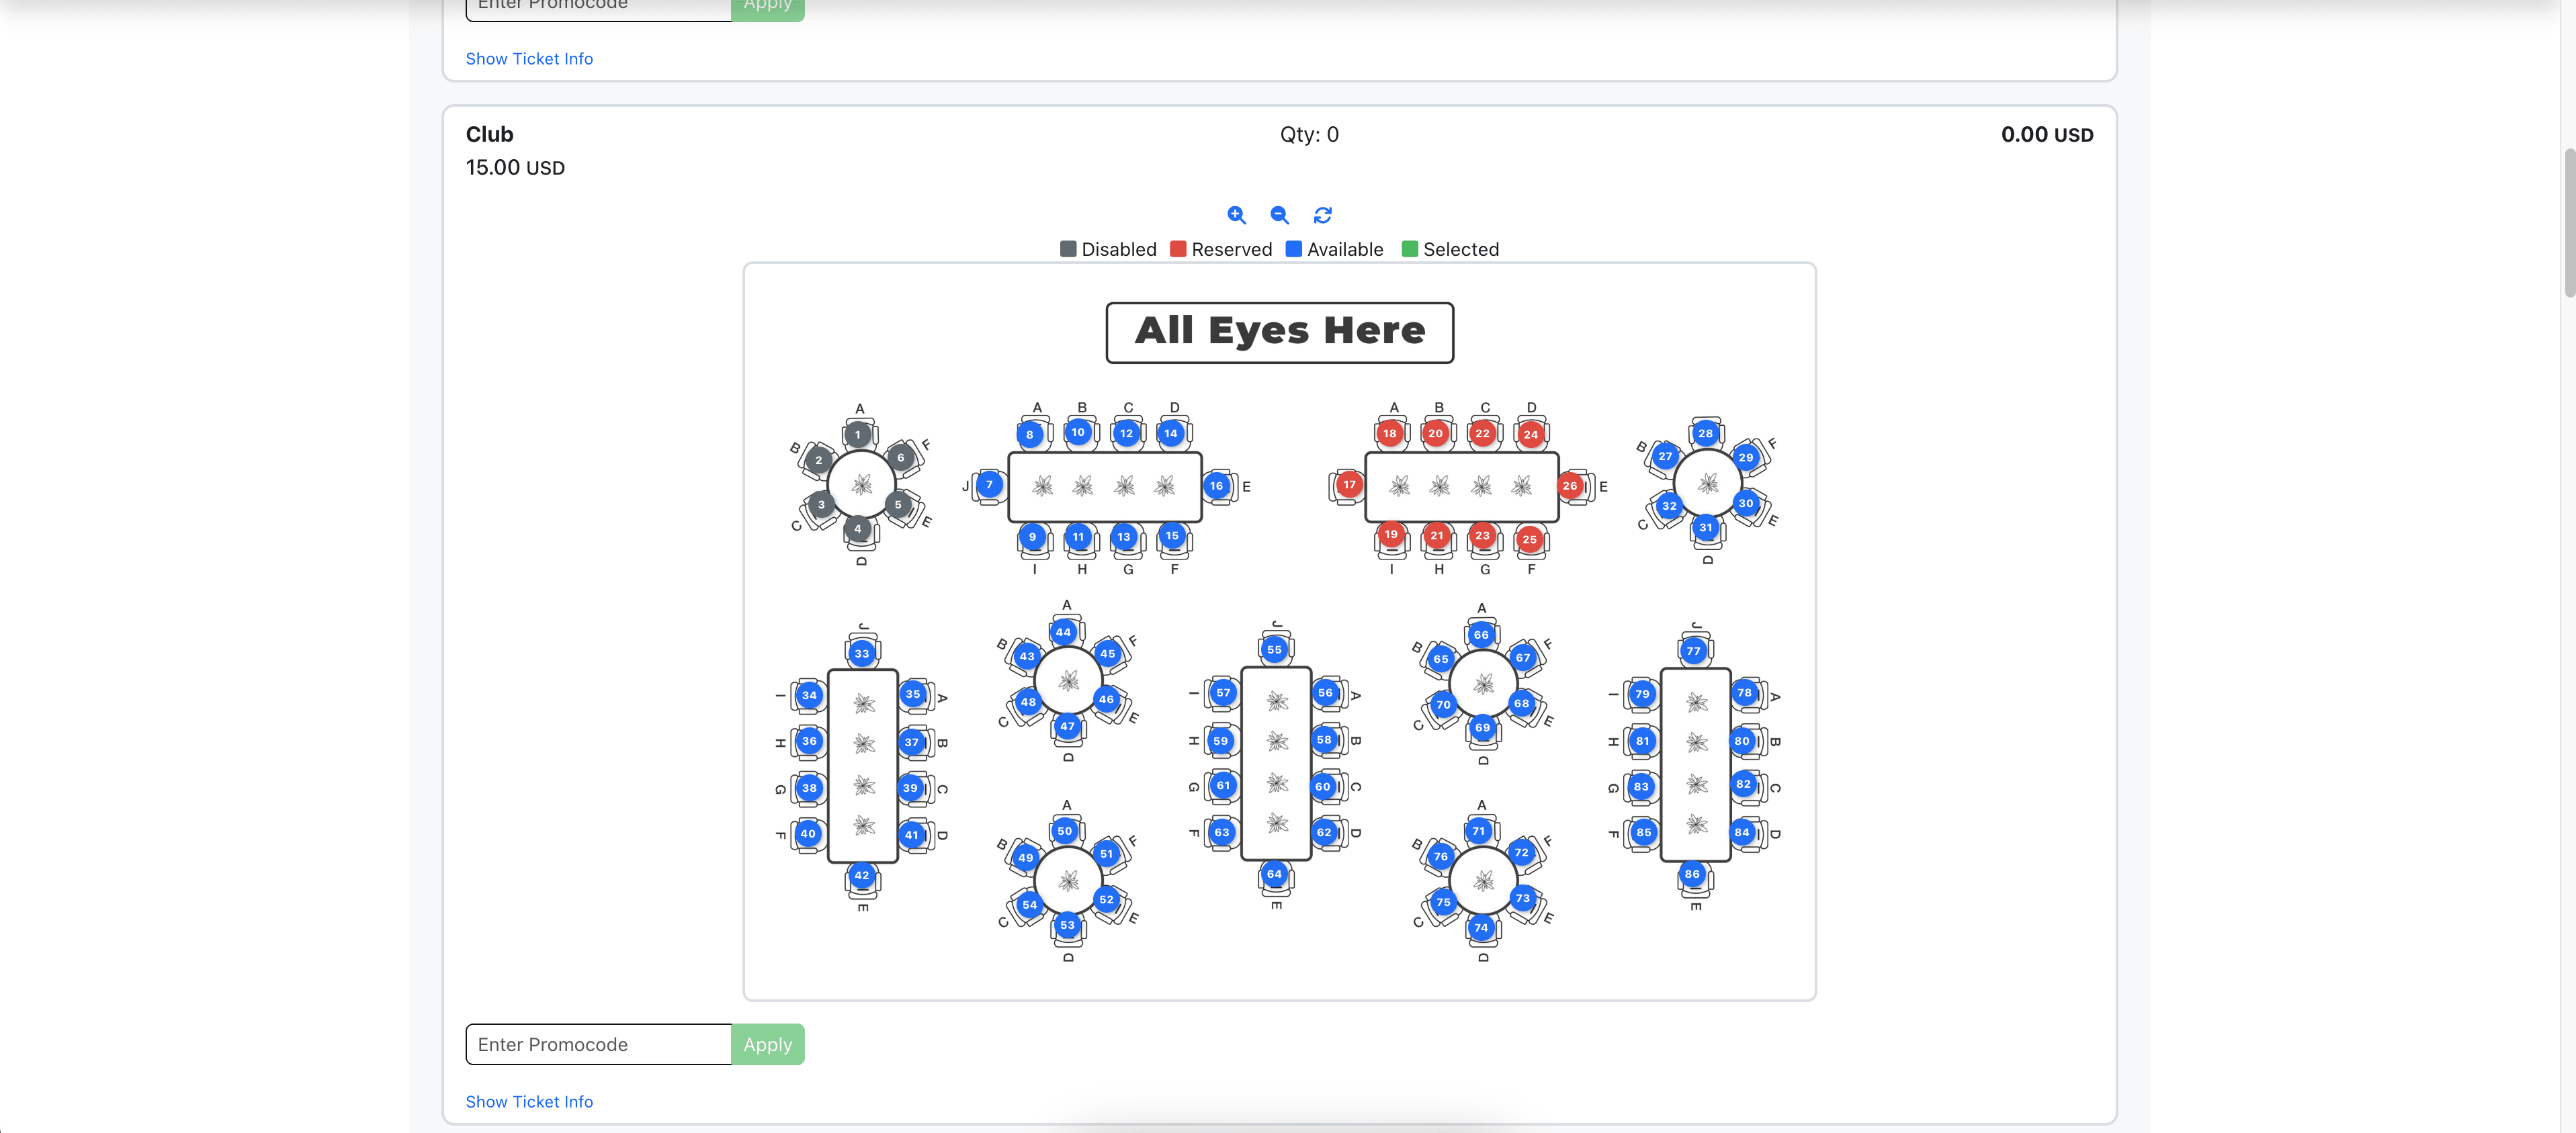
Booking Reserved Seats: Attendee Experience
Once reserved seating is set up, attendees can select and book seats interactively on the event page.
- View the full seating arrangement image on the event page.
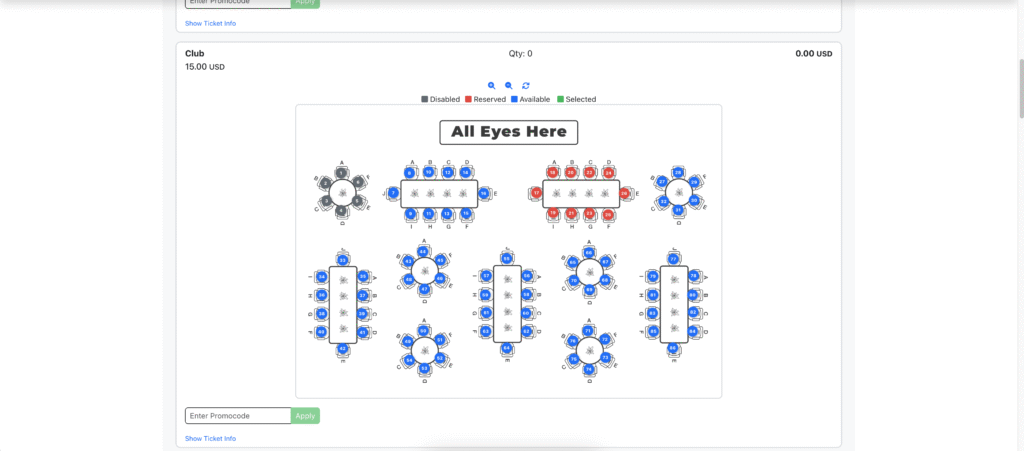
- On the checkout popup, view the reserved seating chart for each ticket type.
- Select seats to book and proceed to checkout. The system blocks the seat for 5 minutes, giving the customer time to complete the booking. During this period, no one else can book the same seat.
- Legends show Reserved, Selected, Available, and Disabled seats for easy reference.
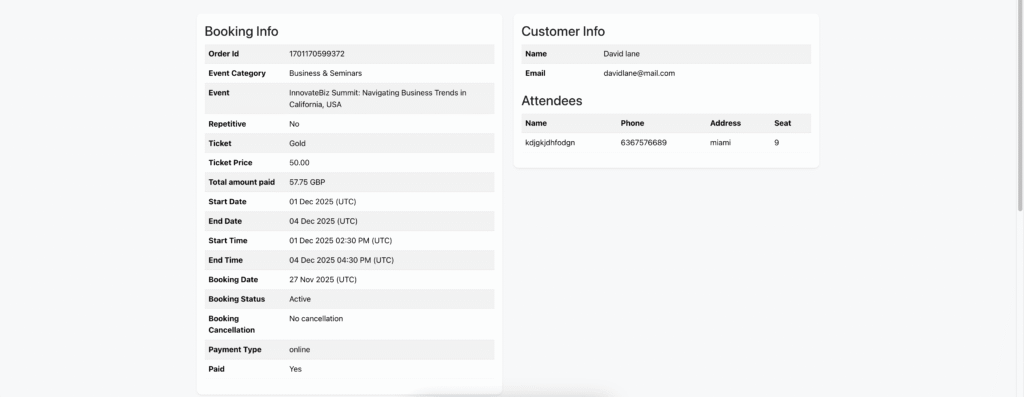
- If booking multiple seats, each attendee’s name, phone, and address must be entered.
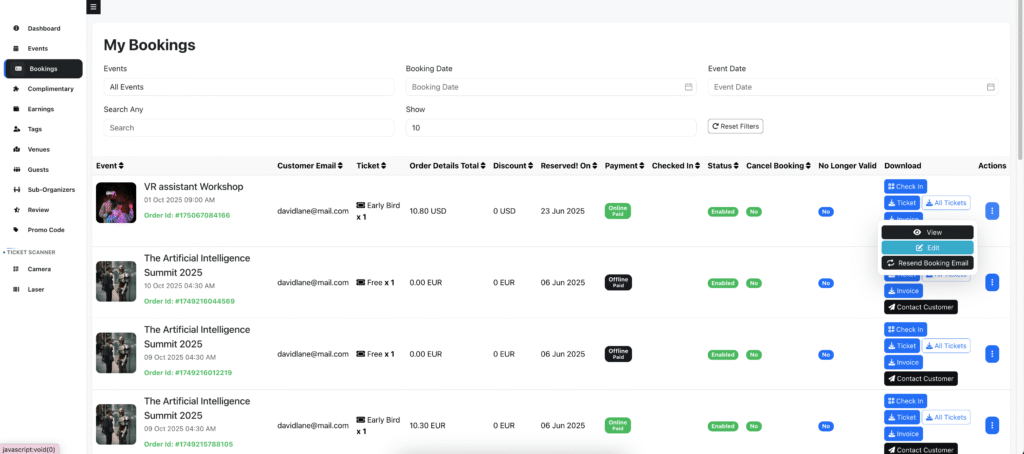
- Organizer and Admin can view attendee details from the Booking Detail page.